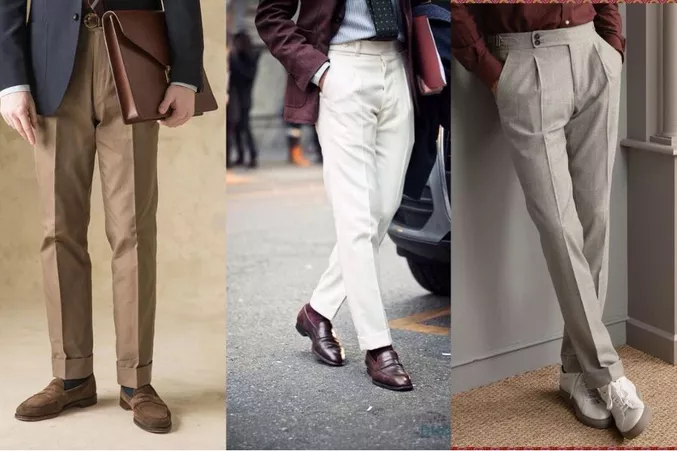
Are you familiar with pants hemming while shopping for clothes? Discover how to beautifully hem pants with Fashion Bandung.
1. What is a trouser hem?
The act of creating a trouser hem involves folding the lower edge of a pant leg inward in order to preserve the pant’s structure and increase its resilience. This technique effectively prevents the fabric from unraveling or wearing out at the bottom. Additionally, the hem adds a certain heaviness to the pant leg, resulting in a visually consistent and balanced appearance when the pants are worn.
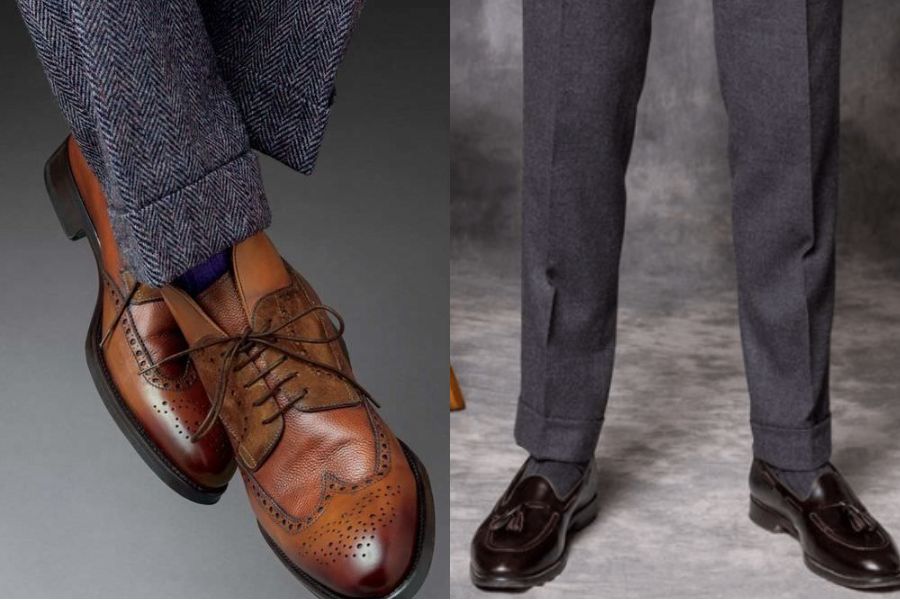
The term “trouser hem” refers to the process of adjusting or finishing the bottom edge of a pair of trousers or pants. It involves folding, sewing, or altering the fabric to create a neat and professional-looking finish. The hemming of trousers is typically done to achieve the desired length and fit, ensuring that the garment is the appropriate size for the wearer. This alteration technique can be performed by a tailor or an individual who possesses sewing skills, allowing them to modify the trousers to meet their specific requirements.
There are various techniques for sewing the hem of trousers, including folded, regular, and decorated hems. The choice of hem style is determined by the pants’ design and the wearer’s personal preference. Hemming pants serves multiple purposes, namely to reinforce the hem’s strength, customize the length to suit the individual’s body shape, and elevate the visual appeal of men’s trousers.
2. Ways to hem trousers
As a continuation of our presentation, Fashion Bandung is delighted to share with you a selection of straightforward and highly sought-after methods for hemming trousers.
How to make pants shorter without using scissors or cutting.
In order to successfully hem pants without cutting, you will need to gather the following tools and supplies:
1. The pants that need to be hemmed.
2. A measuring tape or ruler to accurately measure the desired length of the pants.
3. Pins to secure the fabric in place.
4. A marking tool (such as a fabric marker or chalk) to mark the hemline.
5. A sewing machine or needle and thread, depending on your preferred method of sewing.
6. Thread that matches the color of the pants, ensuring a seamless finish.
7. Scissors, in case any excess fabric needs to be trimmed.
8. An iron and ironing board or a press cloth, to press the hem and achieve a neater appearance.
9. Optional: Seam ripper, in case any mistakes need to be corrected.
10. Optional: Seam sealant, to prevent fraying of the fabric edges.
Having these tools ready will enable you to successfully hem your pants without cutting, making them the perfect length while preserving their original style and structure.
- Needle and thread or sewing machine
- Pins
- Iron
- Tape measure or ruler
To successfully execute this method, one must diligently follow the series of steps outlined below:
- Step 1: Measure the length of the pants that need to be hemmed
First, locate your trousers and ensure they are readily available. Stand up tall with a good posture, ensuring your back is straight and your shoulders are aligned. Next, approach someone and kindly request their assistance in measuring and determining the desired length of your trousers. Instruct them to carefully utilize a tape measure to accurately measure and mark the required length.
Subsequently, seek the aid of another individual who possesses the necessary skills to hem your trousers according to the designated mark. Ideally, the hem should be adjusted to a length slightly above your ankle, ensuring a proper and aesthetically pleasing fit.
- Step 2: Fold the pants hem
To ensure that both pant legs have the same length and avoid one leg being higher than the other, please follow these steps:
1. Begin by turning the inside of the pant legs out.
2. Next, fold the bottom edge of each pant leg up to the marked position.
3. It is important to be cautious and ensure that both pant legs are folded evenly to achieve equal length.
- Step 3: Pin the folded part in place
After folding the desired part, carefully fasten it with a pin. Make sure the pin is placed evenly and securely so that it does not cause any shifting in the hem.
- Step 4: Iron the folds
Once you have folded the fabric, take an iron and carefully press the folded area. By doing so, you will create a sharp crease that will make it easier to sew and will also give your hem a more professional and tidy appearance when it is complete.
- Step 5: Sew the folded part in place
In this step, you will utilize either a needle and thread or a sewing machine to sew a straight line along the folded edge. It is recommended to sew the line approximately 1 – 2cm away from the folded edge. If you choose to sew by hand, take care to make small and even stitches to ensure that the hem remains secure.
- Step 6: Finishing
After completing the aforementioned steps, take a closer look at the entire hem to thoroughly examine for any errors or imperfections. Give it a final touch by ironing the hem once more to achieve sharp and appealing folds. Finally, turn the pants leg inside out. By following these instructions, it is possible to hem your pants without the necessity of removing any excess fabric.
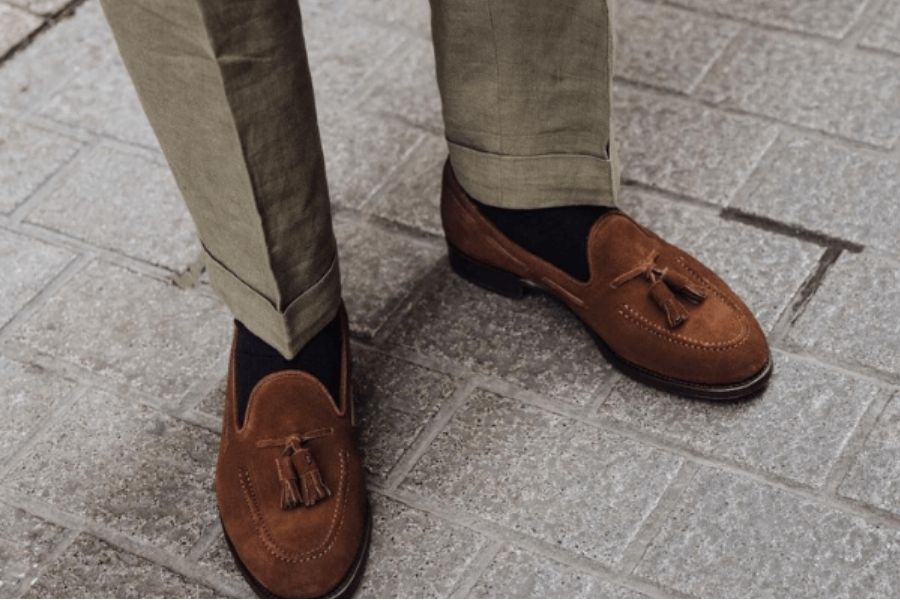
If you need to make your pants shorter but don’t want to cut them, there are a few alternative methods you can try. One option is to cuff or roll up the hemline of your pants to your desired length. This technique works well with jeans or casual trousers and can easily be adjusted if needed. Another approach is to use hemming tape or fabric glue to secure the folded-up portion of the pants instead of sewing. This method is relatively quick and simple, but it may not be as durable as sewing. Additionally, you can use fabric fasteners or clips to gather excess fabric at the bottom of your pants discreetly. These attachments allow you to temporarily adjust the length of your pants without causing any permanent alterations. They are particularly useful if you only need a temporary solution, like during a special event or when borrowing pants from someone.
How to hem trousers
How to Hem Trousers: Fashion Tips from Bandung
Bandung, known for its fashion-forwardness, is a city that embraces creativity and style. If you have a pair of trousers that need hemming, fear not! We have some detailed tips on how to achieve the perfect hem, just like the skilled tailors of Bandung.
First, gather all the necessary tools. You will need a measuring tape, fabric chalk or pins, sharp scissors, matching thread, sewing needles, and an iron.
Start by deciding on the desired length of your trousers. Try them on and determine how much length you want to remove. Remember to take into consideration the type of shoes you usually wear with these trousers.
Next, turn the trousers inside out and use a measuring tape to mark the new hemline. Measure and mark from the bottom of the original hem to ensure a precise and even hem all around.
Once the hemline is marked, use fabric chalk or pins to secure the fold at the new hemline. Be careful to keep the trousers flat and smooth while marking or pinning.
Using sharp scissors, carefully cut along the marked hemline, ensuring a straight and even cut across both pant legs. Take your time to avoid any mistakes or uneven cuts.
Now it’s time to start sewing. Thread a needle with matching thread, and tie a knot at the end. Start sewing from the inside of one pant leg, close to the edge of the fabric. Use small, even stitches to secure the edge of the newly cut fabric. Continue sewing around the entire hemline until you reach the starting point.
When you reach the starting point, make a few extra stitches to secure the hem and tie a knot to secure the thread. Trim any excess thread.
Once the hem is sewn, carefully press it with an iron to give it a clean and professional finish.
Finally, turn the trousers right-side-out and try them on to ensure the length is as desired. If any adjustments are needed, repeat the process until the perfect hem is achieved.
With these detailed instructions, you too can achieve a professionally hemmed pair of trousers, just like the fashion-savvy individuals of Bandung. Embrace your creativity and fashion skills, and enjoy your newly tailored trousers!
To successfully hem your trousers, you will need the following tools: a measuring tape to accurately determine the desired length, a pair of sharp fabric scissors to neatly cut the excess fabric, pins to hold the folded hems in place, a sewing machine or a needle and thread to secure the hem, and an iron to press the hem for a polished finish. These essential tools will aid you in achieving a professional and well-fitted hem for your trousers.
- Sewing machine
- Pins
- Drag
- Tape measure
- Iron
- Sewing chalk or marker
Below are detailed instructions for hemming trousers:
1. Gather the necessary tools: You will need a pair of pants, a measuring tape, pins, scissors, a sewing machine or needle and thread, an iron, and a suitable thread color.
2. Try on the pants: Put on the trousers to determine the desired length. Fold the excess fabric inward until you reach the desired hemline.
3. Measure and mark the length: Stand in front of a mirror and use the measuring tape to measure the distance from the bottom of the fold to the desired hemline. Mark this length with pins or chalk evenly around both pant legs.
4. Remove the pants: Take off the trousers and lay them flat on a table or ironing board.
5. Prepare the fabric: Fold the bottom edge of each pant leg up to the marked hemline, pressing it flat with an iron. Ensure the fold is even and matches the marking.
6. Trim the excess fabric: Use sharp scissors to trim the fabric above the ironed fold. Be careful not to cut too close to the fold, leaving a small allowance for the hem.
7. Pin the hem in place: Fold the fabric up again along the ironed fold, securing it with pins evenly spaced around the pant leg. Make sure the hem is even and the fabric is smooth and wrinkle-free.
8. Set the sewing machine: If using a sewing machine, select a suitable thread color and insert it. Adjust the machine to a straight stitch and set the needle to align with the edge of the fabric.
9. Sew the hem: Starting at one side seam, sew along the folded edge of the hem, removing the pins as you go. Maintain a steady pace and try to keep the stitching line parallel to the original hem.
10. Hand-stitch the hem (optional): If you don’t have a sewing machine, or prefer a hand-stitched finish, use a needle and thread to sew a straight stitch along the edge of the hem. Make neat and even stitches, securing the fold in place and removing the pins as you go.
11. Finish the hem: Once the hem has been sewn all the way around, trim any excess thread and give the trousers a final press with an iron. This will ensure a polished and professional look.
12. Try on the pants again: Put on the trousers to check the length. Make any necessary adjustments by repeating the hemming process if needed.
Following these detailed instructions will help you successfully hem your trousers to the desired length.
- Step 1: Measure and mark the desired length
To start, make sure you are standing upright and then proceed to try on the pants. Retrieve a tape measure and use it to accurately determine the specific area that requires hemming. This can be accomplished by marking the spot using either tailor’s chalk or a marking pen.
- Step 2: Fold and pin the pants
To begin, turn the pants inside out. Then, fold the bottom edge of the pants fabric up to the specific position indicated in step 1. Use a pin to securely hold the folded section in place, ensuring it remains fixed while sewing. Make sure to firmly pin the fabric to prevent any shifting or movement.
- Step 3: Iron to create creases
To achieve a professional-looking finish and simplify sewing projects, it is recommended to utilize an iron. By carefully pressing the fabric fold with the iron, you can effectively smooth out any wrinkles and create a well-defined crease. This crease serves as a helpful guide, making it easier to handle and sew the fabric accurately.
- Step 4: Sew the hem in place
To achieve a clean and professional finish, utilize a Hemming machine to sew a straight line along the folded edge of the fabric. Take care to leave a distance of approximately 1 – 2cm from the folded edge, ensuring that the seam is secure and visually appealing.
When selecting the stitch for sewing, it is crucial to choose an appropriate one that will result in a strong and aesthetically pleasing seam. Different stitch options are available on the Hemming machine, allowing you to customize the type of stitch that suits your fabric and desired outcome. By carefully selecting the appropriate stitch, you can ensure that the seam holds up well and enhances the overall appearance of the fabric.
- Step 5: Check and complete
After completing the sewing process, it is important to carefully inspect the entire hem to ensure that no imperfections remain. This involves thoroughly examining the stitches, fabric, and overall finish of the hem. It is crucial to pay attention to any loose threads, uneven sewing, or any other flaws that may have occurred during the sewing process. After a thorough examination, the next step is to press the hem once again. This involves applying heat and pressure with an iron to smoothen out any wrinkles or creases in the fabric. By doing so, the hem will have a neat and professional appearance, enhancing the overall quality of the garment.
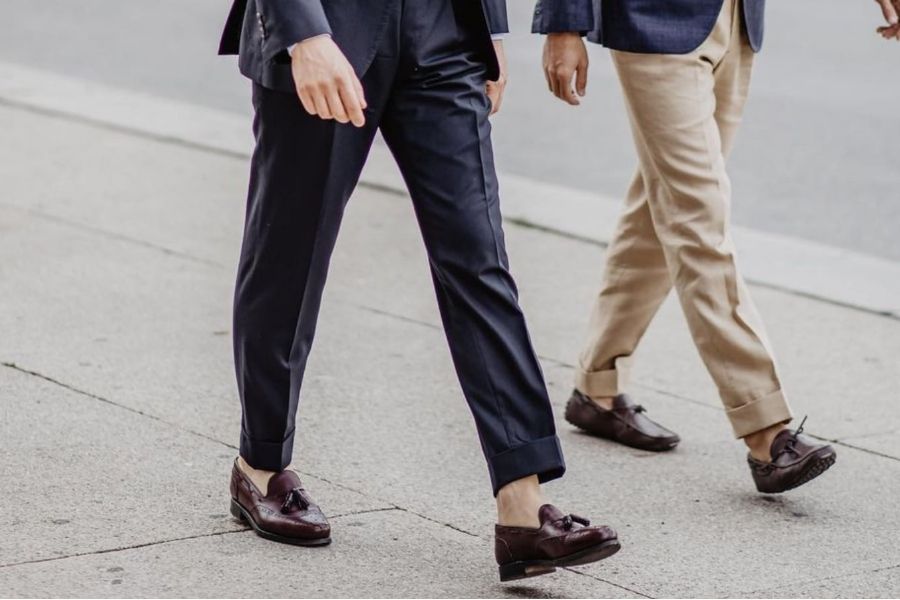
“Steps to Hem Trousers”
The use of trouser hemming machines is favored by numerous individuals due to its ability to produce pants with durable and consistent seams, elevate their overall aesthetic appeal, and significantly save on time. By utilizing this machine, trousers are ensured to have sturdy and even stitching throughout, enhancing their longevity and overall quality. Additionally, the machine’s precise and efficient operations greatly reduce the time required to hem pants, allowing users to complete this task more quickly and efficiently.
How to hem trousers
Hemming pants is a straightforward sewing technique that involves either repairing or refreshing the bottom hem of pants. To successfully hem pants, several essential tools are needed for the process:
- Sewing machine or needle and thread
- Fabric of the same or similar color as the trousers
- Drag
- Pins
- Iron
Below, you will find a detailed breakdown of the steps involved in hemming a pair of trousers:
1. Start by trying on the trousers and determining the desired length. Use a mirror or have someone assist you in marking the desired hemline.
2. Lay the trousers flat on a clean surface, ensuring that both legs are fully extended and aligned.
3. If necessary, gently press out any wrinkles or creases in the trousers using an iron, taking care not to stretch or distort the fabric.
4. Measure and mark the new hemline using fabric chalk or pins. If the trousers have a pre-existing hem, fold it up to the desired length and secure it in place with pins or clips.
5. Once the new hemline is marked, carefully remove the trousers and turn them inside out.
6. Measure and mark the distance from the raw edge of the fabric to the desired hem length, ensuring these measurements are consistent across both legs.
7. Using a ruler or measuring tape, draw a straight line connecting the marks from step 6 along both trouser legs. This will serve as the cutting line for the excess fabric.
8. Double-check the measurements and cutting lines to ensure accuracy before proceeding.
9. With sharp fabric scissors, cut along the marked cutting lines, trimming away the excess fabric. Take care to cut in a straight line to avoid an uneven hem.
10. Once the excess fabric is removed, fold up the raw edge to meet the marked hemline, ensuring that the fold is even and consistent across both legs. Use pins or clips to secure the fold in place.
11. Thread a needle with thread that matches the color of the trousers. Tie a knot at the end of the thread.
12. Starting from the inside or backside of one trouser leg, insert the needle through the folded edge to hide the knot. Take a small stitch through both layers of fabric, working your way along the hemline.
13. Continue sewing small, even stitches along the folded edge of the fabric, ensuring that the stitches are hidden and secure. This stitch is called a blind hem stitch.
14. When you reach the end of one leg, knot the thread securely and trim off any excess.
15. Repeat steps 11-14 for the other trouser leg.
16. Once both legs are hemmed, re-try the trousers to ensure the desired length has been achieved. Make any necessary adjustments or modifications, if needed.
17. Finally, give the trousers a final press with an iron to smooth out any creases or wrinkles and to set the newly hemmed seam.
Congratulations! You have successfully hemmed your trousers, ensuring the perfect fit for your desired length.
1. Begin by thoroughly washing the trousers to ensure they are clean and ready for alterations. Once clean, iron them to remove any wrinkles or creases.
2. Put on the trousers and assess the desired length. Use pins to mark the hemline at the appropriate length. Take into consideration factors such as personal preference, style, and comfort.
3. To ensure accuracy, measure and mark the same length on both pant legs. This step is important to avoid an uneven or lopsided hem.
4. Carefully turn the trousers inside out to access the original hem. Take your time to remove any threads or stitches that hold the original hem in place. This step is crucial for creating a professional-looking new hem.
5. Fold the fabric at the marked hemline, ensuring that the fold is even and straight. Secure the folded fabric in place using pins, ensuring that it stays in position throughout the rest of the process.
6. Now, use an iron to press the new fold and create a crisp, well-defined crease. Take caution while ironing to avoid damaging the fabric or creating any unwanted wrinkles.
7. Using a needle and thread or a sewing machine, sew along the crease line to secure the new hem in place. Make sure your stitches are neat, even, and durable. This will help ensure that the hem withstands wear and tear.
8. After sewing the new hem, trim any excess fabric from the bottom of the trousers. This step helps provide a clean and tidy finish. In addition, secure the edges with a zigzag stitch or a serger to prevent the fabric from fraying over time.
9. Turn the trousers right side out and try them on to double-check the length. This step allows you to ensure that the new hem meets your desired length. Make any necessary adjustments before proceeding.
10. Finally, give the hem one final press with an iron to create a polished and finished look. This step helps eliminate any remaining wrinkles and gives the trousers a professional and well-tailored appearance.
Please keep in mind that it is important to allocate sufficient time and make necessary alterations to the steps provided in accordance with your individual preferences and proficiency level.
- Step 1: Prepare pants and fabric
To start, take a fresh piece of fabric that is the same width as your pants and long enough to allow for folding the hem. Generally, a length of about 5 to 10 centimeters should be adequate for this purpose.
- Step 2: Cut off the old hem (if necessary)
If the previous hem of the pants is in a worn-out state or in poor condition, it should be removed entirely. Following this, it is important to accurately measure and cut both pant legs evenly. This step is crucial in order to ensure that the length of the pants remains uniform once they are joined together. By taking this precaution, the final result will reflect a professional and balanced appearance.
- Step 3: Pin and sew the fabric together
After obtaining the new fabric, start by folding the edge of the fabric approximately 1 to 2 centimeters to form a neat hem seam. This will help prevent fraying and give a finished look to the fabric.
Next, align the folded edge of the fabric with the edge of the pant leg, making sure that the right side of the pants and the right side of the fabric are facing each other. Secure the fabric in place by pinning it to the pant leg. This will hold the two pieces together during the sewing process.
Finally, choose either a sewing machine or a needle and thread to sew the fabric to the pant leg using a straight stitch. This stitch will provide a secure and durable attachment. Sew along the pinned edge of the fabric, removing the pins as you go. Take care to maintain an even and straight line, ensuring that the fabric is securely attached and the hem looks neat and professional.
- Step 4: Fold and iron the hem
In this particular step, take the seam allowance of the pant leg and fold it upward towards the inside to create a neat and tidy hem. Proceed to use an iron to carefully press and flatten the folded hem, ensuring that a sharp and distinct crease is formed.
- Step 5: Sew the new hem in place and finish
Once you have folded the fabric to create a new hem, proceed to stitch a straight line all around the edge of the hem. Make sure to keep the stitching approximately 1-2cm away from the folded edge to ensure a secure hold. This stitching will further reinforce the hem. Lastly, carefully inspect the hem for any errors or imperfections. Once you are satisfied with the stitching, give the hem a final press with an iron to achieve a clean and crisp fold.
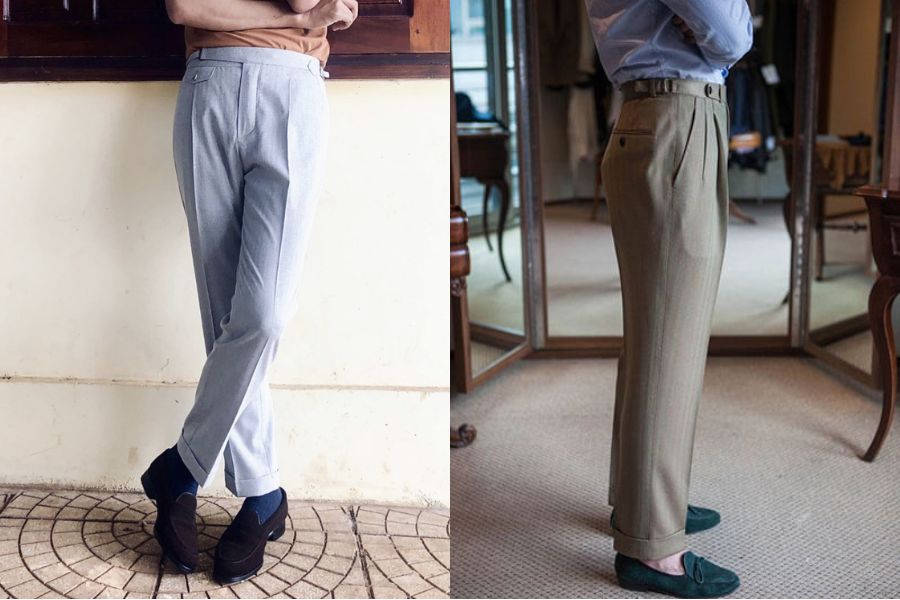
“How to shorten pants”
This article, published by Fashion Bandung, seeks to provide a comprehensive answer to the question: “What are trousers?” In this article, we will explore the different techniques used to hem trousers and help you determine which method is most suitable for your specific needs. Our aim is to provide you with valuable fashion knowledge that can enhance your understanding and personal style choices. Additionally, we invite you to take a moment to explore Fashion Bandung’s extensive collection of fashionable products, including men’s shirts, jackets, men’s jeans, and more! We take pride in offering beautiful, high-quality items at affordable prices.
Explore the vibrant world of men’s fashion in Bandung, Indonesia. Bandung is a city known for its creative flair and sartorial sophistication, making it a haven for fashion enthusiasts. From trendy streetwear to dapper formal wear, Fashion Bandung offers a wide range of options to suit every individual’s style and preference.
In Bandung, you will find a plethora of boutique stores, fashion outlets, and local designers showcasing their unique and cutting-edge collections. Whether you are looking for casual apparel or high-end designer pieces, Fashion Bandung has it all. With its diverse selection of brands and labels, you can easily find the perfect outfit that reflects your personality and keeps you up-to-date with the latest fashion trends.
One of the reasons why Fashion Bandung stands out is its emphasis on quality and craftsmanship. Many local designers in Bandung focus on producing handmade and artisanal pieces, ensuring each garment is meticulously crafted to perfection. This attention to detail not only adds value to the clothing but also showcases the city’s commitment to preserving its fashion heritage.
Additionally, Fashion Bandung is known for its affordability. Many stores offer stylish clothing at reasonable prices, making it accessible to a wide range of consumers. Whether you are on a budget or looking to splurge, you can find fashionable options that cater to your financial constraints.
Moreover, Bandung’s fashion scene is not limited to just clothing. The city is also known for its accessory shops, shoe stores, and grooming essentials tailored for men. Whether you are in need of a statement watch, a fashionable pair of shoes, or high-quality grooming products, you can find them all in Fashion Bandung.
Beyond the retail experience, Bandung also hosts various fashion events and showcases throughout the year. These events provide a platform for emerging and established designers to present their collections to a wider audience. From fashion shows to exhibitions, these events create a vibrant and dynamic atmosphere, allowing fashion enthusiasts to immerse themselves in the creative world of men’s fashion in Bandung.
In conclusion, Fashion Bandung offers a diverse and exciting range of men’s fashion options, reflecting the city’s creativity and passion for style. With its unique blend of local designers, boutique stores, and affordable prices, Bandung is a must-visit destination for fashion enthusiasts looking to explore and indulge in the world of men’s fashion.

